
ESD Workbench Setup — Grounding and Surface Resistance Checks Before Your First Shift
A bench is only an ESD bench when three things check out: the worktop dissipates static, there is a real path from that worktop to earth, and the operator is connected to the same ground. Skip one and you have a steel bench with a green top — which is what most “anti-static” benches turn out to be.
This guide is for buyers and production engineers who have to prove a bench works, not just order one: the surface resistance figure to ask for, the ground path to test, and the spec list that decides the rest.
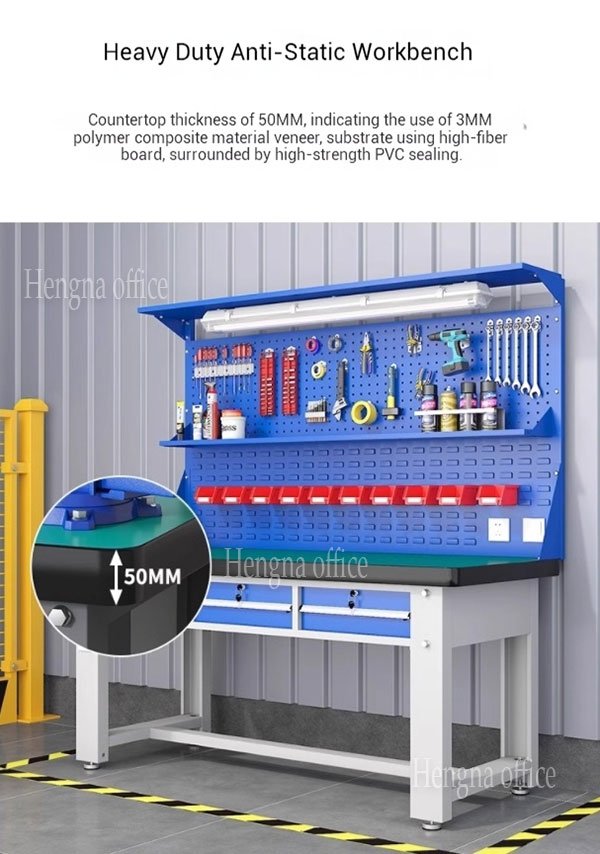
The three links in the chain
Static damage happens when a charge has nowhere to go. An ESD bench is a controlled path to earth, and it only works if all three links are intact.
| Link | What it does | What to check |
|---|---|---|
| Worktop | Bleeds charge off a board or a tool the moment it is set down | Surface resistance in the dissipative range, not conductive and not insulating |
| Bench to earth | Carries that charge away from the bench | A grounding chain or strap from the bench frame to a verified earth point |
| Operator | Keeps the person at the same potential as the work | Wrist strap with a working cord, or heel grounders and a dissipative floor |
A break in any one link is invisible from the outside, which is why incoming inspection is worth ten minutes.
Surface resistance: the number buyers never ask for
The worktop’s surface resistance figure is what separates a real ESD bench from a painted one. Look for the dissipative range: high enough that touching the bench is not a shock path, low enough that charge does not sit on the surface. On our benches the laminated ESD worktop sits in the 10⁶ to 10⁹ ohm band.
Two failure modes to watch for:
- Insulating top. Ordinary laminate or painted metal holds charge instead of releasing it. The bench looks the part and does nothing.
- Conductive top. Bare metal bleeds charge well and also puts the operator in the fault path — not the safer option.
Measure it with a meter and two electrodes, on a clean top. Silicone polish or an untreated cleaner builds an insulating film over a good board — the usual reason a bench that passed last year fails this year.
The ground path: one test before the first shift
The bench has to be connected to earth, and standing on a concrete floor is not a connection. The path runs from the bench frame, through the grounding chain supplied with the unit, to a point the site has verified as true earth.
- Fit the grounding chain to the frame and connect it to the earth point the electrical team confirms.
- Measure continuity from the worktop to the earth point, and write the reading on the bench label — it is the number the next audit asks for.
- Repeat after any move. A relocated bench loses its earth connection more often than it loses a drawer.
This is separate from the bench power supply. The outlets run the tools; the ESD ground is its own point on the frame, not a pin on the socket strip.
The operator side
The third link is the person. Either a wrist strap with a cord, or heel grounders with a dissipative floor — and mixing the two without checking the floor is where most programmes fall down.
- Wrist strap. Test the cord, not just the band. A coiled cord that looks fine can have an open conductor at the plug end.
- Where to clip it. Onto the bench’s ESD point, not a painted frame or an isolated machine body.
- Footwear or floor. Heel grounders need a dissipative floor. On sealed epoxy with no dissipative finish, the operator is insulated whatever they wear.
- Daily check. A wrist strap tester at the bench takes seconds and catches the fault before the boards do.
Specifications that come with the bench
| Item | Range on our ESD workbench line |
|---|---|
| Length | 1,200 / 1,500 / 1,800 / 2,100 mm |
| Depth | 750 mm across the range |
| Height | 800 mm (sitting), 1,250 mm with a single panel, 1,740 mm with a double panel |
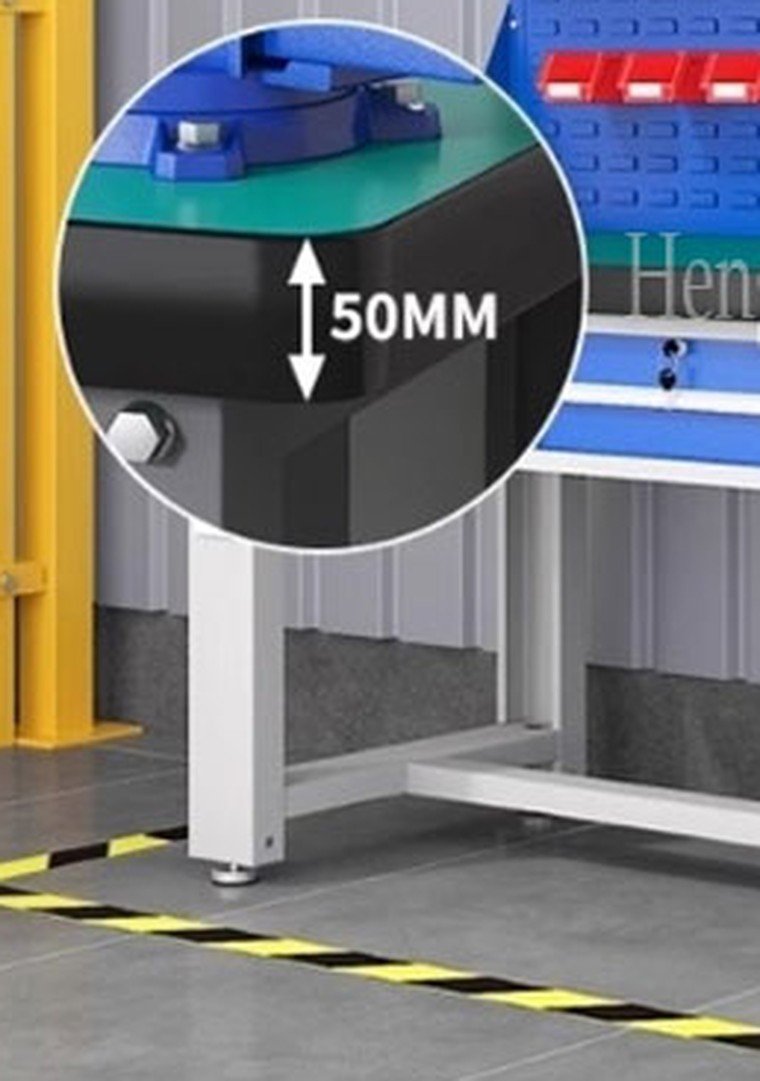
| Worktop | ESD laminate board, 40–50 mm, dissipative surface, 10⁶–10⁹ ohm |
| Frame and panels | Fully welded cold-rolled steel tube, powder-coated; square-hole pegboard at 25 or 50 mm pitch, or louvre panel |
| Storage | No drawer, one hanging drawer, two, three with central locking, single-door cabinet with four drawers, or four drawers on each side |
| Grounding | Grounding chain and connection point fitted as standard |
What else belongs on the bench
- ESD-safe bins and trays. A conductive tote keeps the chain unbroken; an ordinary plastic bin breaks it.
- Ioniser where insulating parts cannot be grounded and charge builds anyway.
- Ground monitoring on assembly lines, so a broken strap raises an alarm instead of a scrap report.
- Labels and 5S floor marking, so the earth point stays accessible for the next test.
Before the first shift: the order sheet and the check
- Length and height for the station, and whether the operator stands or sits
- Worktop surface resistance figure, stated on the order
- Panel type and pitch, matched to the tools the station keeps on the wall
- Drawer and cabinet configuration, with central locking where the station holds calibrated tools
- Grounding chain and connection point — confirmed as included, not assumed
- Socket layout for the bench position, ordered with the unit
- Continuity test after installation, with the reading recorded on the bench label
How these benches are built
The benches run on the same steel line in Luoyang as the rest of our workshop furniture: welded tube frames with corner reinforcements, powder-coated after welding, finished with an ESD laminate worktop.
Two records pass on with the order: the worktop batch and its surface resistance band, and the grounding point specification — both asked for when a customer’s auditor reviews the bench a year later.
Custom work is routine: length cut to a bay, panel pitch changed for a tool set, drawer layouts mixed across a line of stations, colour matched to floor marking. Send the station layout, the tools and the process, and we will return the configuration and the accessory list.
Common questions
Can I use any laminate top on an ESD bench? No — it has to be a dissipative ESD board. Standard laminate holds charge; bare metal puts the operator in the fault path.
How often should the bench be tested? At installation, then on the interval your quality system sets — monthly on assembly lines, quarterly for a repair station.
Does the bench need its own earth rod? Usually not — it connects to the building’s verified earth, so the electrical team confirms the point.
Are the drawers and panels ESD-safe? The frame, worktop and ground point are. Bins and trays are specified separately, because what sits on the top is part of the chain.
What does the warranty cover? One year on the bench from delivery; bulk-order terms are confirmed on the order.
The short version
An ESD bench is three links: a dissipative worktop in the 10⁶–10⁹ ohm band, a grounding chain to verified earth, and an operator connected to the same point. Put the surface resistance figure in writing, test continuity after installation, and re-test after any move.
Send the station layout, the process and the tools, and we will come back with the configuration, the grounding accessories and a quote within 24 hours.
Boltless Steel Shelving Guide — Beam Pitch, Deck Type and How Load Ratings Actually Add Up
Boltless shelving is held together with keyhole slots and snap-in beams. There is no bolt, no...
Read articleMobile Tool Cart Guide — Casters, Ball-Bearing Slides and the Parts That Give Out First
A tool cart and a tool cabinet do not fail in the same order. Put a...
Read articleFlammable Storage Cabinet Venting — When Ducting Is Required and When to Leave Bungs In
Most flammable storage cabinets should stay sealed. NFPA 30 does not require venting for fire protection,...
Read article